
Curtains can be a unique addition to any room, adding style, warmth, and privacy. However, buying ready-made curtains can be expensive, and finding the perfect design to match your decor can be challenging. That’s where drop cloths come in! This comprehensive guide will show you how to make curtains from drop cloths, a budget-friendly and customizable alternative.
Table of Contents
Introduction
Making Your Own Curtains from Drop Cloths Solution
Curtains not only enhance the aesthetics of a room but also provide privacy and control over the amount of natural light that enters. Making curtains from drop cloths could be the perfect solution if you’re looking for a cost-effective and creative way to dress up your windows.
This guide will walk you through creating unique and attractive curtains from readily available drop cloths. Whether you’re a seasoned DIY enthusiast or a complete beginner, you’ll find this guide helpful in transforming your living space. So, let’s dive in and learn how to make curtains from drop cloths that will elevate the ambiance of your home.
Materials You’ll Need
Before we jump into the process, let’s gather the materials you’ll need for Make Curtains from Drop Cloths:
Materials:
- Canvas Fabric: Choose the canvas fabric that suits your style and preferences. You can find it in various colors and textures. Measure your windows to determine the right amount of material you’ll need.
- Sewing Machine or Needle and Thread: The choice between a sewing machine and hand sewing depends on your skill level and preference. Both methods work effectively for creating canvas curtains.
- Measuring Tape: To ensure precise measurements for your curtains.
- Fabric Scissors: A sharp pair of scissors is essential for cutting canvas fabric cleanly and accurately.
- Curtain Rod and Hardware: Ensure you have a curtain rod and hardware ready to hang your finished curtains.
- Iron and Ironing Board: You’ll need these to remove wrinkles from the canvas fabric and create crisp lines during the sewing process.
Now that your materials are in order let’s move on to the fun part – crafting your canvas curtains!
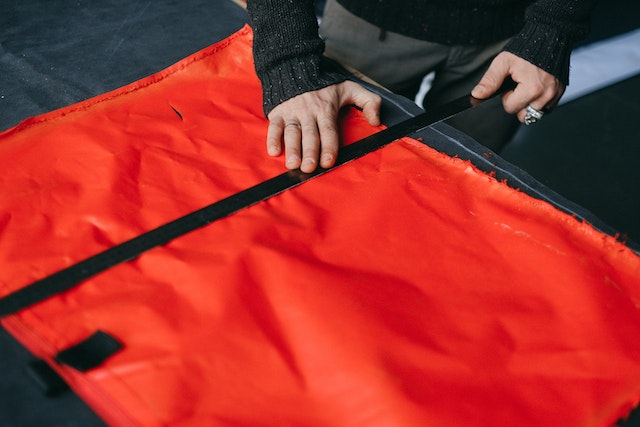
Step 1: Measure and Cut
The first step in creating your canvas curtains is to measure and cut the fabric to your desired size. Here’s how to get it right:
- Measure Your Windows: Use your measuring tape to determine the width and length of your windows. Decide whether you want your curtains to touch the ground or cover the window.
- Cut the Canvas: Lay your canvas fabric flat and mark the measurements you obtained in step one. Use your sharp fabric scissors to cut along these drawn lines. Remember to cut two equal pieces for a pair of curtains.
Step 2: Hem the Edges
To achieve a polished look and prevent fraying, it’s crucial to hem the edges of your curtains. Here’s how to do it:
- Fold and Iron: Fold the edges of your canvas fabric by approximately half an inch and then iron them flat. This will create a neat and clean edge to work with.
- Sew the Hem: Utilizing your sewing machine or hand-stitching skills, sew along the folded edge of the fabric. This will secure the hem in place, preventing any fraying.
- Repeat for All Edges: Be sure to repeat this process for all sides of both curtain panels.

Step 3: Create a Rod Pocket
Now, it’s time to craft a rod pocket at the top of each curtain panel. This is where the curtain rod will gracefully slide through:
- Fold and Iron Again: Fold the top edge of each curtain panel down by approximately three inches and Iron it flat. This fold should be wide enough to accommodate your curtain rod.
- Sew the Pocket: Seam along the bottom edge of the folded fabric, leaving adequate space for your curtain rod to slide through comfortably.
Step 4: Hang Your Canvas Curtains
With your rod pockets elegantly in place, it’s time to hang your canvas curtains and witness the transformation:
- Install the Curtain Rod: Follow the manufacturer’s instructions to securely install your curtain rod above your window.
- Slide the Curtains On. Glide your curtain rod through the rod pockets you crafted in step three. Ensure that the curtains are evenly distributed along the rod.
- Adjust and Enjoy: Play with the length and position of your curtains until you achieve your desired look. Step back, and you’ll be amazed at the beauty you’ve created with your hands – stunning canvas curtains that breathe life into your home!

Why I Love No-Sew, Drop Cloth Curtains
In-home decor and design, there’s an indescribable joy in fashioning a space that mirrors your distinctive style and personality. No-sew drop cloth curtains have emerged as a favorite among the countless DIY home improvement projects that capture this creative essence. These versatile and budget-friendly curtains have become a cherished part of my home for several compelling reasons.
1. Affordability
One of the primary reasons my heart warms to no-sew drop cloth curtains is their affordability. Unlike their store-bought counterparts that can burn a hole in your wallet, drop cloths are remarkably budget-friendly. A rapid trip to the local hardware store or an online order brings these versatile canvases to your doorstep for a fraction of the cost of designer curtains. This affordability allows me to experiment with various window treatments without worrying about breaking the bank.
2. Customization
No-sew drop cloth curtains offer a world of creative possibilities. Whether I’m imagining a specific color scheme, a unique pattern, or a particular texture, drop cloths become my blank canvas for artistic expression. The freedom to paint, dye, or stencil them to harmonize with my decor is a creative joy. This level of customization ensures that my curtains become an integral part of my interior design, weaving a personal narrative into the very fabric of my living space.
3. Ease of Creation
As the name implies, no-sew drop cloth curtains require only minimal sewing skills, making them accessible to DIY enthusiasts of all levels. You can easily create beautiful curtains even if you’ve never ventured near a sewing machine. The straightforward folding and ironing techniques to craft rod pockets and hems are a breeze to learn. This project is the ideal starting point for beginners and a delightful endeavor for seasoned DIYers.
4. Time-Efficiency
Crafting no-sew drop cloth curtains proves refreshingly time-efficient in a world where time is often a precious product. The process can be completed in just a few hours, from measuring and cutting to assembly. The swift improvement allows me to savor the results of my labor sooner, leaving room for more exciting DIY ventures on my creative horizon.
5. Versatility
No-sew drop cloth curtains are the chameleons of the window treatment world. They effortlessly harmonize with various decor styles, from rustic and farmhouse to sleek and minimalist. I can achieve precisely the ambiance I desire with various drop cloth textures, ranging from smooth to canvas-like. Furthermore, these curtains adapt seamlessly to different window sizes and shapes, enhancing their versatility.
6. Texture and Warmth
Drop cloths introduce a delightful texture and warmth to a room, qualities that store-bought curtains often fail to deliver. Their natural, slightly rustic appearance creates an inviting and snug atmosphere, enveloping my space in comfort and charm. The weight and graceful drape of the fabric lend my windows an air of elegance, making them equally at home in formal and casual settings.
7. Sustainability
In an era where sustainability takes center stage, using drop cloths for curtains aligns perfectly with my eco-conscious values. These cloths are typically crafted from cotton, a renewable and biodegradable material. By repurposing drop cloths into curtains, I contribute to waste reduction and promote a more sustainable approach to home decor, all while adorning my living spaces with elegance.
8. Sense of Accomplishment
Above all, a unique sense of accomplishment accompanies completing a DIY project, particularly one that enhances your living space. Crafting no-sew drop cloth curtains fills me with pride in my creativity and resourcefulness. As I hang these curtains and witness the transformation they bring to my room, the profound satisfaction of knowing I’ve created something beautiful with my own two hands is truly rewarding.
Conclusion about Curtains from Drop Cloths
In conclusion, making curtains from drop cloths is a budget-friendly and, fun and creative DIY project. Following the steps outlined in this guide, you can transform your windows and add a personal touch to your home decor.
Remember that drop cloths come in various sizes and textures, so don’t hesitate to experiment and get creative with your designs. Drop curtains can be tailored to match your style, whether you prefer a rustic, shabby-chic look or a more polished appearance.

Frequently Asked Questions(FAQs) Curtains from Drop Cloths
1: Can I dye the drop cloths to match my décor?
Yes, you can! Drop cloths are typically made of cotton, making them suitable for dyeing. Follow the dye manufacturer’s instructions to achieve your desired color.
2: What if I don’t have a sewing machine?
You can make drop cloth curtains by hand-sewing the hems and rod pockets. It may take a bit longer, but it’s entirely doable.
3: How do I clean drop cloth curtains?
Most drop cloths are machine washable. Check the care advice on the label and wash them accordingly. Remove the curtains punctually from the dryer and hang them slightly damp to prevent wrinkles.
4: Can I use drop cloths for other DIY projects?
Absolutely! Drop cloths are versatile and can be used for various projects, including tablecloths, pillow covers, and upholstery.
5: How can I add decorative elements to my drop cloth curtains?
You can personalize your curtains by adding trim, stenciled designs, or fabric paint to create unique patterns and textures. Let your creativity run wild!
6: Are drop cloth curtains blackout
Drop cloth curtains are not blackout curtains by default. To achieve blackout capabilities, you can add blackout liners or layer them with blackout curtain panels.